I posted a couple of pictures of the dividers I created for my Erin Condren Life Planner and had several request for information on them.
So for my dividers I have a Budget Section, Meal Planning Section, Business Section, Fitness Section, Bible Study Section and 30 days of Section.
To create these it was really simple, but you do need a few supplies:
1. Laminator (I got one at Walmart for $19.99)
2. Laminating Sheets (Walmart has letter and legal, plus smaller sizes)
3. Scrapbooking Cardstock (preferably a two sided paper you like because you will see both sides)
4. Scissors
5. Tab Punch (I used the WRMK tab punch)
So first you want to cut your paper down to to 8 1/2 x 6 3/4, then laminate it and then add the tab and the clear overlay to seal the tab and that is it, so very easy.
Here is a video explanation of my dividers and how I use them.
I had a few people ask me to show how I created the foldout dashboard that I use in my Erin Condren Life Planner.
**Disclaimer** I am not the original creator of this fold out dashboard, some one else did it in a Filofax, I have not seen it done in an Erin Condren Life Planner though.
Would you like to win this dashboard? Well if you do, then all you have to do is go and subscribe to my YouTube channel, then come back to here and comment that you did. I will pick a winner on Thursday evening. I'm new to YouTube, but I have several planner and planning inspired video ideas in mind and you will not be disappointed.
Here is the YouTube video, take a look, subscribe and then comment below and you just might get this mailed to you......along with some other goodies!
I decided I needed more real estate in my planner and a fold out dashboard was the way to go for me.
Some use the dashboard to hold sticky note pads but use it for todo items, notes about things that I need to add to my calendar or just misc items I want to remember.
*DISCLAIMER* this was not an original idea I came up with, I had seen this on one of the countless youtube videos that I watched about organizing planners. This particular lady used this concept in her filofax and called it a fold out workboard.
Okay not that I got that out of the way lets get into it. I tried to create this a couple of different ways until I found the way that worked best. I used a thin chipboard and cover it with cardstock - Epic Fail - way to stiff and bulky. Then I tried it with a manilla folder and cover it with cardstock as well, I laminated it but again Epic Fail - it was too thick and the laminator did not laminate it correctly. So my final and successful attempt was using a colored hanging file folder, then I covered the inside with a very thin patterned paper and then laminated it. Score! It worked great. Now you could easily find a cute colored plastic-ey (for lack of a better word) file folder you find at that office supply store but for me I wanted to use what I had.
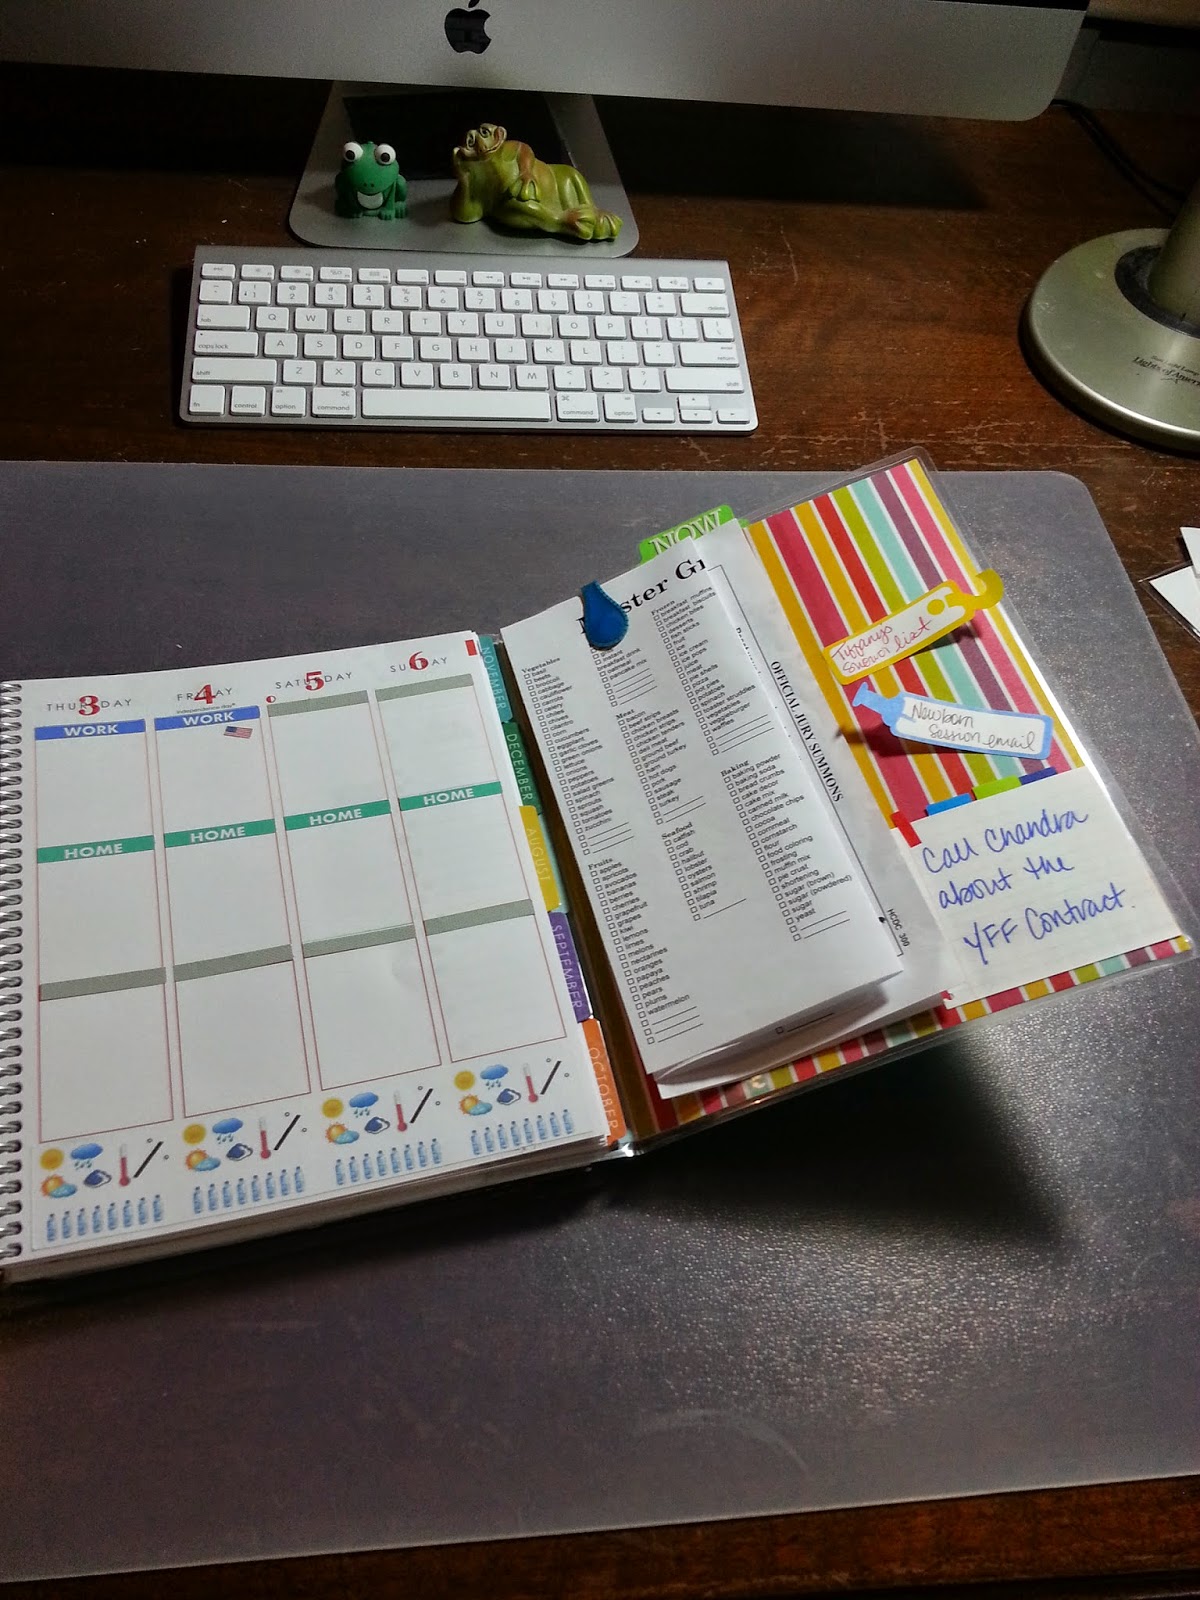
Here is what it looks like:
When you first open to is I have my color code system and at the top you can see the tab I created that says today.
Then you flip it open and see it this way...notice the NOW tab. lol I rand out of small o's and a's so I wanted something short and sweet, obviously if I am looking at it then it's happening right now so the word NOW seemed to fit...and I had enough letters. lol
I have grocery list attached and then a couple of reminder stickers and an sticky note about calling a client. As you can see it opens up and I can see all of these things as I view my weekly spread or even my monthly spread.
So to create this I used the following items:
The tab punch and it comes with clear fold over labels so the tab is laminated, looks great! I could have printed it but I used small letter stickers instead for my NOW and Today.
This is the file folder and the thin patterned paper, it came from a paper pad I think I got from Michael's. It's very thin and one sided so it was not too bulky at all.
And now a video for you to see it...this is my first YouTube, sorry for the format I filmed it on my phone for easy access...but that won't happen again. lol
Wait before I go into the planner, I have to point out that this is only my 3rd post of 2014 and the year is half way over....I totally fail at blogging. BUT with that being said maybe I can use my planner to get back on track. lol (don't hold your breath)
Okay so I jumped on the bandwagon and decided to switch from my filofax and go to the Erin Condren Life Planner....I love that it's spiral bound. I love the colors, it just makes me so HAPPY!
Now I was not too pleased with the cover options, there was not one thing that just screamed pick me, so I decided to design my own. I figured they give you the option to upload a full frame picture so why not go for it.
I'm not a digital scrapbooker by any means but I do create invitations and cards for some of my clients (I have a photography side biz) and I do know my way around photoshop, so I went for it. I am so happy with the way it turned out. Now they did mess up and leave the L out of April and I am patiently waiting for a response from the company but I am very glad the covers are interchangeable so I can live with this for a bit.
I first created the woodgrain background, and I added some paint splatter brushes and then I added my pictures with a drop shadow and the final piece was the silver sequins. The front are pictures of my husband and I, my kids and my furbabies. I love frogs and photography so a frog holding a camera seemed fitting. lol The back are a couple of pictures and some various things that I just like, pictures, quotes etc.
All in all I am so happy with the outcome (except for the name issue) and I am already thinking up a design for my next cover. Oh the possibilities....
The quote on the front, under my name, is hard to read in the picture but it says "Turning my Can'ts into Cans and my Dreams into Plans"
Can't forget the token "My Box Has Arrived" picture.